Blogger Widgets

Windows 10's best tricks, tips, and tweaks

           Windows 10's best tricks, tips, and tweaks


Now that Windows 10 is out and millions of people are already running it, let’s take a look at some of the best hidden features, tips, and tricks in the operating system. If you’re still on the fence, take note: You really do want Windows 10, despite a lot of the gripes we’ve shared over the past several months. It’s worth getting on the list for (or downloading the Windows 10 ISO directly). It combines the best of Windows 8 — super-fast startup, improved security — with much of what made Windows 7 familiar and easy to use, and without trying to force you to buy a touch screen or learn a whole set of hidden UI gestures.
And if you’re a computer nut like me, tweaking the OS is always the fun part. Discovering and implementing power user tips are my favorite part of getting a major new version of an OS. I still remember back when DOS 5.0 came out, and I was running DOS 3.3, and I got to try all these new things to optimize my 286. And when I upgraded from Windows/286 to Windows 3.0, I felt like my life had changed. (We’ve come a long way.) Nostalgia aside, here’s what you need to know to amp up your Windows 10 install and take it to the next level.
GodMode Windows 10

Set up GodMode

The awesomely named GodMode brings up a special menu that puts lots of settings together in one place. To enable it, create a new folder anywhere on your root drive and rename it GodMode.{ED7BA470-8E54-465E-825C-99712043E01C}. It will create a special icon that when you click on it shows you a beautiful advanced control panel.
Windows 10 Virtual Machine

Task view and virtual desktops

One of the best things about Windows 10 is how it handles virtual desktops. The fact that it finally handles them at all, out of the box, is a great step, since Mac OS X and Linux users have had that capability for a long time. It lets you set up a series of tasks and windows on your desktop, your email and Twitter window on another, and a third for general Web browsing and research. To get started, click the Task View icon on the taskbar (immediately to the right of the Search box), or hold down the Windows key (abbreviated throughout as Win) and Tab. You can also drag an app to a new virtual desktop by bringing it over to the +New Desktop option at the lower right. (Click to read more on Task View and Virtual Desktops.)

Configure privacy settings

When you’re first setting up Windows 10, make sure to select a Custom install so you can modify the privacy settings, instead of going with the Express install. (If you already installed it, no worries; you can fix it all in Settings). Otherwise you’ll find yourself agreeing to all sorts of private data sharing — and while Windows 10 is free for Windows 7 and Windows 8 users, it’s not a free product in and of itself — so there’s no reason to share your personal information when it’s not required.

Make the desktop more stylish

Windows 10 lets you personalize your desktop more thoroughly than before. Head to Start > Settings > Personalization > Colors, and choose Show color on taskbar and Start Menu. You can also tell it to automatically pick a color from your wallpaper and apply it underneath icons of open apps, and you can remove the Start Menu’s translucent option.

Print to PDF

You can finally print a document (or rather, save it) as PDF without using a third-party utility. This makes it much easier to save and distribute documents that aren’t easily modified. Another long overdue feature makes it in under the radar.

Make sure WiFi Sense is off

You may feel differently about this, but I certainly don’t like the idea of allowing access to my WiFi network unless I specifically give out the password. Here’s how to make sure your computer isn’t doing that — and if it is, how to turn it off.

Schedule Windows updates

Instead of getting ambushed whenever Microsoft decides to push out a patch, you can schedule restarts to install updates by going to Start > Settings > Updates and Recovery > Windows Update. You can do this for future updates as well by selecting Notify to Schedule Restart.

Run it in a virtual machine

If you’re thinking of taking the Windows 10 plunge, but don’t want to disturb your machine that’s currently running just fine, here’s how to install Windows 10 in a virtual machine first. Note that this is different than the virtual desktops I mentioned above; it’s virtualizing the entire OS within another OS (your existing one).
Explorer Home Tab Quick Access Windows 10

Windows Explorer Home tab and Quick Access

Windows Explorer windows are a lot more useful this time around, thanks to a new Home tab (pictured above). It makes file copies a cinch. If you look at the top left of the window, you’ll see a new Quick Access group that lets you navigate to recently accessed folders. That makes it much easier to maintain a fast workflow as you navigate around your computer’s file system. And while File Explorer defaults to the Quick Access view, if you don’t like it, you can set it back to This PC by choosing View > Options > Open File Explorer > This PC.
Start Menu Clip Windows 10

Customize the Start Menu

The new Start Menu is such a huge improvement over what came with Windows 8.1 that it’s almost impossible to describe the relief. It combines the best elements of Windows 7 and Windows 8. And it’s also fully customizable. You can resize tiles in the Start menu by right-clicking them and choosing Resize, and then selecting a size from the pop-up menu. You can also unpin them or uninstall them completely. I admit the first thing I did is unpin all of Microsoft’s tiles and then shrink the size of the menu so it looks a lot like Windows 7 (pictured).
For a while, during some of the Windows 10 Technical Preview builds, you could pin the Recycle Bin to the taskbar, which makes it a bit more like OS X. Unfortunately, that functionality seems to be gone in the release version, though you can still pin it to the Start Menu as a tile.

Command prompt tweaks

A lot of Windows 10 utilities underneath the service still look the same as they did in Windows 7 and Windows 8. But one of the hidden tweaks is in the Command Prompt — head over to Properties and you’ll suddenly find you can enable a host of customizations, including a transparent background, resizing the window, and word wrap.

Battery saver

If you’re on a laptop and your battery is running low, Windows 10 is smart enough to begin throttling back background services and other threads so that you can squeeze the last bit of battery life out of your machine. To enable Battery Saver, click the Start menu, and head to Settings | System | Battery Saver.

Background scrolling

Ever notice how when you hover your mouse cursor over a window and try and scroll, you still can’t, because the window wasn’t active? Turn this feature on in Settings | Devices | Mouse and Touchpad and you’ll be able to do just that.

Keyboard shortcuts

Here are some keyboard shortcuts you may want to be aware of — ones that will really help your daily workflow:
  • Windows Key-Tab (Task View)
  • Windows Key-Right-Up (Moves app to top right quadrant)
  • Windows Key-Ctrl-Left or Right (virtual desktop)
  • Windows Key-Ctrl-D (new virtual desktop)
  • Windows Key-Ctrl-C (Cortana listening)
  • Windows Key-S (Daily Glance for weather, news, sports)
  • Windows Key-Ctrl-F4 (closes virtual desktop)
  • Windows Key-Up and Down (snap apps to top or bottom of screen or maximizes)OneDrive

OneDrive integration

Free cloud storage is a godsend these days, and Microsoft makes it super easy in Windows 10 with OneDrive. You can use it to store files for mobile device access from iOS or Android, and you can even set it to let you access any file on your PC remotely — not just the ones you drag over to your OneDrive folder.

Amp up Cortana

If you’ve got a laptop, or a desktop with a microphone attached, click the search field and select the Notebook icon on the left. Then click Settings and click “Let Cortana respond to “Hey Cortana.” Now Cortana will listen for your commands. Cortana can also use Google instead of Bing, even though Microsoft really wants you to use the latter. Install the Chrometana extension in Chrome, or just install Firefox and make that your default browser; both will accomplish the task of removing Bing from Cortana’s brain.

Use Maps offline

The new Maps app lets you work offline (Remember those old Microsoft Maps programs?); click Settings > Download or Update Maps, and then select the continent and country you want.

Xbox Streaming

Windows 10 finally shows some real Xbox integration, and you can use it to log into your Xbox Live account. But more importantly, you can use it to stream Xbox One games locally on your PC. You’ll have to enable it first on the Xbox One under Settings | Preferences | Allow game streaming, and then on the PC in the Xbox application. (Interestingly, Microsoft is also going the other way and adding keyboard and mouse support to the Xbox One — not that you’ll need that, since you’ve already got a PC.)
Control Panel Windows 10

Record games and app videos

You can now record videos of apps or games using the Game DVR function. Press the Windows Key + G, click ‘Yes, this is a game box,’ and then you’ll see options to manipulate the recording.

Find the original Control Panel (and other goodies)

The new Settings panel is easy to navigate and makes more sense than the crufty old Control Panel, but you’ll still need the latter to access some deeper options in the system. It’s easy to call up, even though it’s hidden; just right click on the Start button on the bottom left of the screen and choose it from the pop-up menu, or type Control Panel in the Search bar at the bottom left in the taskbar. When you right-click the Start button, you’ll see all kinds of useful things there, such as Computer Management and Disk Management; for what it’s worth, those options bring you right back to the familiar Windows 7-style apps in each case.

Tone down Notifications

Notifications are a giant pain in Windows 10; there’s just too many of them, and some are unnecessary. Turn ’em off by heading to Start > Settings > System > Notifications and actions, and turn off Windows tips and specific app notifications (you’ll need to scroll down for the latter).

Nix the Office ads

Are you sick of the occasional Office ads that pop up on the desktop? So are we. To kill them, right-click on Get Office in the Start Menu and uninstall it.
Thanks...................................


15 Tips and Tricks To Save You From Windows 8.1

     15 Tips and Tricks To Save You From Windows 8.1

If you have Windows 8.1, chances are that you hate it, especially if you came from Windows 7 or XP. I deal with this daily since my work desktop is still on Windows 7, while my laptop is on 8, which means I’m pretty miserable every time I have to switch to the latter.
Here are a few ways to make your experience with this infamous operating system a bit more bearable…

1. Get your start button back.


Windows 8.1 brought back the start button, albeit in an incredibly lame fashion. All it does it take you to that tablet-esque page with all of the useless tiles on it.
To get a proper start button, you’ll want to check out an app called Classic Shell. Once you download that, you’ll be able to get something with some semblance of the old start button. It’s still not as good, but it’s better than nothing.

2. Go straight to Desktop.


Get rid of those tiles once and for all! This will take you straight to your desktop, like Windows 7, when you log into your computer. To do it, right click on the toolbar at the bottom of your desktop, then click properties, navigation, and check the box that says “When I sign in or close all apps on a screen, go to the desktop instead of Start.” The less you have to deal with the start screen tiles, the better!

3. Change the apps Windows 8.1 uses.


I used to hate how Windows 8 would resort to using the weird tablet-esque apps when I wanted to view a photo. Now, you can change that. Use your mouse and send your pointer to the bottom right of the screen. Hit settings, change PC settings, search and apps, and go to defaults. From there you can edit the default apps Windows uses. Now, you no longer have to use the pre-packaged mobile apps that come with 8.

4. Remove those pesky Windows Store apps.


Why deal with all those apps when you have perfectly usable programs installed that do that same thing (and usually better at that)? To get rid of these apps, go to the change PC settings section I referenced in tip #3, except this time hit PC and devices. Now, click disk space, and wait for the page to load. Once that’s done, click “see my app sizes.” Now you’ll see a list of all the apps pre-loaded onto your PC. Feel free to uninstall them all if you want to, I won’t judge you.

5. Organize your apps.


Windows 8.1 allows you to organize your apps in several different manners. First, go to your start screen and click the down facing arrow in the lower left corner. This will take you to the apps screen. From there, you can edit the big box next to the “Apps” title at the top. Choose to order your apps by the date they were installed, by how often you use them, etc. This is a useful tool to see whether there are certain apps you can uninstall (since they’re never used anyways).

6. Make your start button more useful.


Use this tip in the case that you don’t want to use the third party option referenced in #1. To do this, right click your taskbar on the desktop, click properties, then navigation. There, check the box that says “Show the Apps view automatically when I go to Start.” This way, you’ll see a list of apps when you hit your start button instead of the start screen.

7. Easily shutdown your PC.


Back when we were all forced to use vanilla Windows 8, there really wasn’t a way to easily shutdown your computer. You either had to drag your pointer to the corner or do it from the start screen. Now, all you have to do is right click the start button and hit shut down. Simple as that.

8. Adjust your display settings.


To find the Windows 8.1 display settings, go to settings (which can be easily accessed using the hotkey windows button + C), change PC settings, then PC and devices. After that, navigate to display on the left-hand side, and from there you can change your resolution and orientation. You could do all of this by right-clicking your desktop as well, but some will probably prefer the streamlined interface Windows 8.1 offers.

9. View multiple apps at the same time.


This is sort of like Windows 7’s snap to the side feature, though a bit more advanced. First, open up multiple apps. Choose one of them to display on your screen (I chose weather). Now, move your pointer to the top left of your screen so you can see the other apps you have running. Choose any of them, right click, and select “insert left.” Now you’ll have two apps on the screen. Then, repeat this process, except this time when right clicking the app select “insert center.” Now you’ll have three apps on the screen. This is useful if you need to keep track of a lot of information at once, or if you’re running your PC through a large television screen and have the real estate to view multiple things simultaneously.

10. Disable hot corners.


While the hot corners in Windows 8 sometimes prove to be useful, often they can be a nuisance, especially if you accidentally move your cursor to the edge of your screen and something pops up when you don’t want it to.
To turn them off, navigate to PC and devices, which you access in the same way you did before (settings > change PC settings > PC and devices). Instead of going to display, this time go to “corners and edges.” Under the corner navigation subheading, turn off both options. Now, neither the charm bar nor the recent apps list will pop up when your cursor creeps onto the right or left edges of your screen.

11. Take advantage of smart search.


Smart Search is one feature that I’ll give Microsoft credit for. From the start screen, just start typing and Smart Search will initialize. You can search for a file, a program, or even something you want to find on the web. Smart Search will literally search everywhere for what you’re seeking. Use it when you don’t have time to open your web browser, or are too lazy to search your cluttered desktop for a program you want to use.

12. Find obscure settings easily.


This is a slight variation of the Smart Search trick. Instead of setting Smart Search to look for “everything” use the drop down menu to set it to only look for settings options. This makes it much easier to find regularly sought options related to mouse pointer speed, projecting to a second screen, and changing your desktop background.

13. Save online articles for later.


This is useful if you are going to an area where there’s no internet connection, or if you see an article you want to read but have to leave in a few minutes. To do this, find the article you want to save, and launch the settings bar (windows button + c). Then, click the share button, which should open the Reading List app. From there, add the article to the app, and it will be there for you to read at a later date.

14. Use the cloud.


A lot of people use Drop Box, but if you want to stay in the Microsoft ecosystem OneDrive comes preloaded into Windows 8.1 (it used to be called SkyDrive, for the record). To back up documents to the cloud, go to settings, change PC settings, OneDrive. There, set “save documents to OneDrive by default” to on. Now your documents are protected in the cloud, useful in the case that your hard drive crashes or your computer takes a swim.

15. Do something cool with Xbox Music.


If you’re going to be saddled with all of these Microsoft-related apps, you might as well put them to good use. This one actually has a semi-cool feature, in that it can create a playlist based on the website you are currently viewing. It does this by searching for songs or artists mentioned there, and pulling them up for you to listen to. To access this feature, go to a website, open the settings sidebar (windows button + c), and click share. Now, select Music, and it’ll create a playlist for you. While a lot can be said about Windows 8.1’s negatives, I’d say this is a pretty nifty little tool!
Windows 8.1 is far from perfect (as evidenced by the fact that Microsoft is pushing hard to release a Windows 9). Still, it’s packed with plenty of  interesting features if you’re willing to look for them. If anything, hopefully what I talked about in this list will keep your brain from dreaming of Windows 7…at least for a little while!


Windows 8: 15 tips and tricks

                       Windows 8: 15 tips and tricks

15 tips to improve Windows 8 We’ve spent more than a year immersed in Microsoft’s multiple Windows 8 beta and final releases, so we feel we know it better than we know our own mothers.Windows 8 brings countless small improvements to the operating system we’re all used to, but it also introduces bigger changes that can only be fully appreciated after a period of adjustment.


1. Take charge of the Start screen

15 tips to improve Windows 8
Microsoft understandably gives its own apps due prominence on the Start screen, but you’re free to change that. You can drag tiles around the grid, and a right-click on certain tiles brings up options to make them larger or uninstall them completely.
You should make good use of Windows 8’s tile groups. You can drag any tile to a blank space on the Start screen to create a new group, but for some baffling reason you can’t name those groups immediately. Instead, you have to use Semantic Zoom – pinch to zoom out on a tablet, hold Ctrl and scroll the mouse wheel, or click the tiny minus symbol in the bottom-right corner. Then, when in the zoomed-out view, just right-click or swipe a finger upwards on a group to give it a name. It might not sound like much, but when you have a lot of applications installed, it makes a significant difference to usability.
As for the grid layout, there’s also a way to change the number of tile rows on the Start screen – but don’t get your hopes up. The highest supported row count is six and the maximum for any given device is determined by screen size and resolution, so if your tablet boots with three rows then you probably won’t be able to increase that number. Still, it can be useful for lowering the row count on a big monitor – perhaps to match the layout of a smaller tablet or laptop for consistency.
To tweak this, search for and run “Regedit”, and before you do anything, click File | Export and save the Registry in case anything goes wrong. Then navigate to HKEY_CURRENT_USERSoftwareMicrosoftWindowsCurrentVersionImmersive-ShellGrid and look for an entry named Layout_MaximumRowCount. If it isn’t there, right-click on an empty space and create a new DWORD value, and give it that name. Then edit that entry, enter the number of tile rows you’d like and reboot your system.

2. Add a proper Shutdown button

We know it’s only three clicks to shut down a PC in Windows 8, but it’s the location of the power controls that’s annoying. Instead of them being hidden away in a charm, it’s easy to create your own power buttons for both the desktop and the Start screen.
Right-click on the desktop and select New | Shortcut. In the box, type “shutdown /s /t 0” (replace the /s with /r for a Restart button), and name it. To give it an icon, right-click your new shortcut and select Properties, then click Change Icon and choose the big power button. That’s your desktop Shutdown button. To add that to your Start screen tiles, right-click the icon and choose Pin To Start.

15 tips to improve Windows 8

Of course, the Windows-I key combination takes you directly to the Settings charm for a saving of one click, or you could use Ctrl-Alt-Del and the power button that pops up in the bottom-right of the screen, but many people – including several here at PC Pro – still prefer a single-feature button in plain sight.

3. Customise the lockscreen

On a home PC you may not see the lockscreen often, but on a tablet it pays to set it up properly. In the Personalise menu, choose a lockscreen picture and a selection of apps, which will show quick status updates without the need to unlock the system. By default, you get Messaging, Mail, Calendar and Weather, and even if you intend to use other apps for these tasks, it makes sense to set up each with your accounts, if only for this purpose. You can also choose one app to push more detailed data, although right now the choice is limited.

4. Use a picture password

Although it works reasonably well with a mouse, this option is intended to take away the pain of logging into Windows 8 on a tablet. Rather than going through the hassle of bringing up the onscreen keyboard and tapping out a password, Windows 8 lets you log in by tracing lines or shapes onto a photo. You choose the image and the three distinct lines or shapes drawn on it in order, so it’s important to create your “password” carefully, using the objects in the picture as pointers. Unless you do something incredibly unimaginative, such as drawing the three sides of a triangle on a picture of a pyramid, it’s secure – and easier to remember than a traditional password.

5. Install DVD software

15 tips to improve Windows 8
Microsoft has opted to remove the DVD codec from Windows 8 – every licence costs money, and a large number of people will never use it – so you’ll want to download a free player instead. The best supported is VLC media player, which plays back DVDs and CDs along with a range of other file types.
Alternatively, if you’re running Windows 8 Pro, until 31 January you can add the Media Center pack for nothing.

6. Make full use of multiple displays

The “Modern” UI has proved divisive among PC users, but in our experience, those with a second display find it far less annoying. Since those big tiles appear only on one screen, you can nip into Modern to open an application without disturbing the document or browser that’s open on the other monitor.
However, there’s more you can do to improve the experience, including a tweak to make your taskbar more useful. Right-click on the taskbar and select Properties, then in the Multiple Displays section, set Windows 8 to show buttons on the “Taskbar where the window is open”. This lets you see at a glance – and interact with – only the applications running on that monitor.

7. Bring back the file delete confirmation

The first thing that struck us when we started with Windows 8 was how easily files vanish. Whether it’s a right-click and Delete when you intended to click Rename, or an accidental tap of the Delete key, Windows 8 no longer seeks permission before consigning that vital document to the Recycle Bin. It’s not hard to search through the bin to retrieve a file, but that extra layer of protection can be reinstated.
Search for and open “Regedit”, back up your Registry with the Export option before you begin, then navigate to HKEY_CURRENT_USERSoftwareMicrosoftWindowsCurrentVersionPolicies. Create a new Key within Policies called Explorer, which should appear as a further nested folder in the tree. Within that folder, create a new DWORD value called ConfirmFileDelete, and change its value to 1. You can disable the change by reverting it to 0.

8. Set up Storage Spaces

One of Windows 8’s rarely discussed but most interesting features, a storage space is essentially a group of physical disks that the system views as one logical storage location. It’s mainly a business feature, but in the home it’s a little like a less complex way to set up a RAID-like array. Just plug in any spare hard disks you have – it doesn’t matter if you mix models and capacities – and search for Manage Storage Spaces. The wizard helps you to set up your extra drives as one simple lump of storage, or in various mirrored modes for added data resilience.
Better still, the storage space you create is flexible. If you have two spare 250GB disks lying around, you could set up a 500GB space; when you fill that, just plug in a third disk and extend the capacity. Windows 8 handles all the behind-the-scenes stuff so that to the user, it just looks like one big drive. You can’t do any of this to your main system disk, so storage spaces make most sense on PCs with a relatively small disk hosting the OS and several large hard disks set up solely for data.
For more information, read our guide to Storage Spaces.

9. Use the Task Manager

It’s one of our favourite improvements, but it’s still one many people never use – or even know about. Press Ctrl-Shift-Esc to open the Task Manager, and use it regularly to keep an eye on resource-hungry apps, especially if you’re on a metered 3G connection. The handy new App History tab tells you all you need to know, and it’s now easier to disable apps if they’re unreliable.

10. Use the admin menu

Another feature that Microsoft should make more obvious is the admin menu that gives quick access to the Device Manager, Command Prompt, Control Panel and much more. It’s right there on the desktop if you know where to look. Move your mouse to the bottom-left corner and the Start screen icon will appear, but ignore that and instead right-click to bring up the closest thing Windows 8 has to the traditional Start menu. Alternatively, quickly open the menu by pressing Windows-X.

11. Make use of child accounts

The Windows Store brings a new complication to PCs. Apps are tied to the user profile under which they were purchased, which confuses matters on a family PC. Of course, you want the kids to access that expensive Encyclopaedia Britannica app, but you don’t necessarily want them to play with your financial files or other apps you’ve accumulated.

It goes without saying that you should look through the extensive range of settings in Family Safety, which allow you to set time limits on your child’s PC usage and block age-restricted games from the Windows Store. We’re less enamoured by the rather over-the-top child-tracking tools Microsoft has included.

12. Enable God Mode

No, it doesn’t give you infinite ammo and health, but this long-time favourite of power users provides quick access to every setting and maintenance utility in Windows 8 in one place. Just create a new folder on the desktop and call it “GodMode.{ED7BA470-8E54-465E-825C-99712043E01C}” (omit the quote marks). The OS will automatically tidy up the name and the symbol will change to show that it’s now a system folder. Double-click it and enjoy the power.

13. Create a locked-down guest account

God Mode
On a similar topic to number 11, it’s also useful to have a special account with restrictions for visitors. Once you’ve set it up and installed a few of the most commonly used apps, you can prevent guests from uninstalling anything from the Start screen. Search for and run “Regedit”, run an Export to back up your Registry, then navigate to HKEY_CURRENT_USERSoftwarePoliciesMicrosoftWindows. Once there, create a new Key under Windows called Explorer, and within that, create a new DWORD value called NoUninstallFromStart. Change its value to 1, reboot, and right-clicking on an app in the Start screen will no longer offer Uninstall as an option. This can also be a useful setting on shared accounts.

14. Buy touch accessories

Learning the new keyboard shortcuts and pinning your most frequently used applications to the desktop taskbar can make the transition to Windows 8 much smoother, as can spending a little more cash on the right accessories.
Microsoft has produced a range of gesture-based touch mice and keyboards that have their own charm shortcut keys – we’ve previously reviewed the Wedge Touch Mouse and Mobile Keyboard. Logitech has also released its own range of Windows 8 accessories, and more manufacturers will certainly follow as the OS gains traction. The new Start screen is really designed for touch and gestures, so don’t underestimate how much more intuitive the Windows 8 experience can be when you look beyond a traditional mouse and keyboard – even on a desktop PC.

15. Bring back the Start menu

This one was glued to the top of a lot of wishlists as each beta version of Windows 8 came and went, but there’s a good reason why this is the final option we mention. Yes, you can bring back the Start menu easily enough and carry on working as you were in Windows 7, but we strongly urge you to give Windows 8 a fair crack before taking that step. That’s because few of the drastic changes are as nonsensical as they seem on first boot, and you simply can’t appreciate this without fully immersing yourself in the OS. You might even find you like a new way of doing things.
Done that? Still not happy? Then we recommend an open source application by the name of Classic Shell. It not only brings back the Start button, but also the nested, fully customisable menus, complete with the old Shutdown controls within easy reach. It doesn’t actually dispose of the modern Start screen, so you can still try the Windows 8 way if the desire takes you, but let’s not kid ourselves: this is about keeping things usable for desktop PC owners, and it works.

 Thanks for Visiting...........


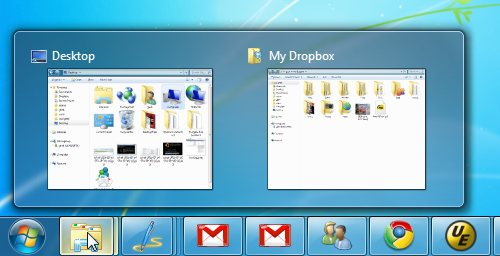
The Power User's Guide to the Windows 7 Taskbar

       The Power User's Guide to the Windows 7 Taskbar


It seems like every week we learn about a new tip to enhance the Windows 7 taskbar, and it's hard to keep them all straight. Here's the complete power user's guide to tweaking and using your taskbar like a pro.

Learn to Use the Taskbar Like a Pro

Before you even get started trying to tweak your taskbar, you should make sure that you understand how to use all of the features, and there might be more than you think—check out our complete guide to Windows 7 shortcuts to learn useful basic maneuvers, like how you can hold down the Ctrl key while left-clicking to cycle through a group of taskbar buttons, or hold down Shift while right-clicking to show the regular window menu. Here's the full list of Taskbar-specific shortcuts:
  • Win+number (1-9): Starts the application pinned to the taskbar in that position, or switches to that program.
  • Shift+Win+number (1-9): Starts a new instance of the application pinned to the taskbar in that position.
  • Ctrl+Win+number (1-9): Cycles through open windows for the application pinned to the taskbar in that position.
  • Alt+Win+number (1-9): Opens the Jump List for the application pinned to the taskbar.
  • Win+T: Focus and scroll through items on the taskbar.
  • Win+B: Focuses the System Tray icons.
  • Drag+Drop taskbar buttons or System Tray icons: to reorganize them.
  • Shift+Click on a taskbar button: Open a program or quickly open another instance of a program.
  • Ctrl+Shift+Click on a taskbar button: Open a program as an administrator.
  • Shift+Right-click on a taskbar button: Show the window menu for the program (like XP does).
  • Shift+Right-click on a grouped taskbar button: Show the window menu for the group.
  • Ctrl+Click on a grouped taskbar button: Cycle through the windows of the group.
  • Drag a File to a taskbar button: to pin the file to the current application's Jump List.
  • Shift+Drag a File to a taskbar button: to open a file with the current application.
  • Middle-Click on a taskbar button: to open a new instance of the application.
  • Middle-Click on a Aero Thumbnail: to close that application instance.
  • Left-Click + Drag upwards: to open the Jump List for an application.

Any problem........

All Windows activator 7,8,8.1,10

                     All Windows activator 7,8,8.1,10


Welcome and great to see that you found this site. We try to provide the best info related to Windows 7,8,10 download, product key and activation related resources. You can download the KMSPico latest version for free.

We all loved Windows 7 much more then Vista as it were pretty and not a mess driver wise. Now what had changed in term of activation process? Well Win 7 changed and evolved the SLSVC to SPPSVC and incorporated further refinement of the registry licensing. We still had the winlogon.exe stuff and now we had some more activation required programs along with online checker that could be used.
Now imagine that the newer OS without the winlogon.exe file and a split of the user interface licensing wise. Yes that pretty much defines all the changes which were done to the licensing on Win 8. Everything else for the most part stayed the same with the previous edition.
Also, the rearm feature that was in older OS has been changed in Win 8. Rearming a Windows 8 system will not extend the trial period. In older system, you can rearm or reset the 30-day trial and extended up to 120 days. So, for newer OS to fully activated, you need to use Windows activator like KMSpico.
This one is the same as the older version except that it has a new key for it along with some changes in the KMS activation portion. There were also changes with features in the licensing to further unify the Windows RT API with the latest operating system.

KMSpico Portable – The Best Windows 8/10 Activator?

kmspico
There are several Win 8 or 10 activators that you can use as highlighted in the book . You can get the ebook and take advantage of it now.
Many people try to go online and downloaded the third-party loaders but not all of them are working and even some of them can harm your computer! If you are one of the frustrated with the Windows 8 activator that is not working, I bet you with the KMS Pico latest version you will never get disappointed!
The KMS Pico is so far the most popular and perfect activator that can be use to activate all the latest editions of OS, including the Server editions as well as the Microsoft Office. You do not need any activation @ product key or serial number in order to use the tool.
The tool already in the market for few years and now with the release of the latest version 10 it’s even better. Many bugs were fixed to make it perfect and activate almost all the latest OS and Office with just few clicks.
If you had bad experience in using any other activators before you can try the KMSPico. Just uninstalled any previous tools in your PC and use this proven software. This is the best site to download KMS offline activator. More information on how to use the tool is provided in the section below. Click on the following button to freely download the latest KMS pico tool now!

About KMS Activation and KMS Pico Activator Features

The KMS stand for Key Management Service and it’s a way to activate large amount of PCs such as in schools, colleges or universities. So each PC uses a unique code that identified what operating system was used and it syncs up with the server activation along with that host key.
With that said, this software not only activates all editions of Windows 8 and 8.1, but it also supports older versions of OS. However, if you are using Win7 (any editions), we recommend you use the more reliable loader called Win Loader v2.2.2 by Daz.
Following are some of the key features of the latest KMSpico 10.1.8:
  • Great program – It activates Vista/7/8/8.1/10, Server 2008/2012/R2 and Microsoft Office 2010/2013/365/2016 (both 32-bit & 64-bit).
  • 100% lifetime genuine activation – Not like some other loaders that is not permanent solution. If you use this loader and once activated, it will detect and realize the infinite loop of automatic activation (every half year).
  • Full-automatic activation – Doesn’t need any manual intervention, so simple that just clicks the button and let the program do the rest!
  • Parallel activation – Support the both Windows and Office activation at the same time, and automatically identify the version or edition.
  • Clean and free of malware – Don’t release any unnecessary files that will harm your computer.
  • Offline activation – No Internet connection required during the activation process.
  • Very easy to use – Once installed the tool (steps below), just one-click to activate your OS and/or MS Office.
  • Support 32-bit & 64-bit versions OS – The tool do the activation in one package with automatic detection and hence that is not a problem no matter which software version you are using.
  • Support newest OS – This activator is able to remove Windows 10 watermark as well as version number removal.
  • All languages supported – As you may know, all the Microsoft products are available in many languages, luckily the the tool support all languages.

Supported Windows and Office Editions by KMSPico

The following table summarize the versions of programs (software) supported by the activator. Please note that if you are using the older OS (XP, Vista, 7), you need to install .NET Framework 4.0+ first before you can use the program. Of course you need a valid operating system installed on your PC.
The OSThe MS OfficeThe Server
Win Vista Business/NOffice 2010 AllServer 2008 Standard/Datacenter/Enterprise
Win Vista Enterprise/NOffice 2013 AllServer 2008 (R2) Standard/Datacenter/Enterprise
Win 7 Professional/NOffice 365 AllServer 2012 Standard/Datacenter/Enterprise
Win 7 Enterprise/NOffice 2016 AllServer 2012 (R2) Standard/Datacenter/Enterprise
Windows 8 All
Server All
Windows 8.1 All

Windows 10 All

Note: Both 32-bit & 64-bit versions are supported.

Download

Click here

Download Best Hackers Movies

                           Download Best Hackers Movies


     The Italian Job                         2     Codice Sword Fish          
                
                                           sword fish poster     italian job poster
                                      
              Download                                     Download

2.     Hackers                                    3.   War Games
hackers posterwar games poster
                                                           Download                                              Download    


         4.Trone                           5.Pirates Of Silicon Valley

tron posterpirates of silicon valley poster


  Download
                                                                                        Download


                                   7.Anti Trust


antitrust poster

                                     DOWNLOAD
Watch and comment.
for more keep visiting don't forget to share.
 POSTED BY Ansar


The SSL Certificate and Your Website’s Security

        The SSL Certificate and Your Website’s Security by Ansar

                             SSL Certificate and Website Security

When you are surfing the internet, a lot of information is being exchanged between the web host and the device being used to surf the internet. This type of information can always be easily breached by hackers, especially if it involves online transactions and this has always been a major issue when dealing with the internet. Nowadays, cases of online theft are becoming increasingly popular. There is one way of determining whether a site is safe to use through an SSL Certificate which is powered by the beauty of cryptography.

How SSL Cryptography Works?

Cryptography ensures that data is transmitted in a means that only the intended party can access it. You can easily determine a site which has an SSL certificate by the padlock icon that is displayed beside the web address. So how do SSL certificates work? SSL in full is Secure Sockets Layer. An SSL certificate provides tight security during the exchange of data.
PadLock Icon Showing SSL Security
In SSL cryptography, encryption makes use of separate keys for the decryption and encryption of data. Encryption keys are public and anyone can use them. But the decryption keys (ones used to turn encrypted data into meaningful information) are private and are kept secret. The SSL certificate, on the other hand, can simply be described as a tiny data file that has the appropriate information about a certain website. The information can be quickly read by the host connection once the request for connection is received. It is through an SSL that a website can prove its authenticity to a web browser.

How To Get SSL Certificate?

ssl certificate
An SSL certificate is not handed out like a college certificate. There are a number of companies called Certificate Authorities (CA)that authenticate that a site/server is legitimate and sign a resultant digital certificate which is then stored, just like a cookie is stored on your browser. The certificate will continuously alert all incoming connections and protocols that the connection is trustworthy.

SSL Certificate Advantages

SSL Certificate benefiets
SSL certificates make online data-exchange, especially financial transactions, safer. It is a common rule of thumb not to trust any e-commerce site that does not have an SSL certificate. There is just too much information floating around online nowadays such as credit card info, banking information etc. The safety of all these vital information will be ensured by the SSL certificate, and every browser will accept the websites incoming connections. However, most small websites, such as blogs, don’t really need to supply an SSL certificate.
Don't forget to comment
 

Contact us

Name

Email *

Message *

Follow us on FB

Blogger news

More custom template flexibilityLast May, we added some expressions to our templating language to make it easier for you to customize your blog’s look and feel. These new expressions proved popular with those of you who enjoy advanced blogging tools, so we wanted to offer you even more flexibility. Starting today, we’re introducing a new set of operators, which we’re calling lambda expressions...